Installing Single Metal Gates
sales@gardengatesdirect.co.uk

- Gates
- Railings
- Fencing
- Accessories
& Fitting- Sheds
& Storage- Garden Structures
- Design
& StyleHow to Install Single Metal Garden Gates
Before you commence installation please check to ensure the added weight placed on the structure you are hanging the gate off is capable of taking its weight. If you are in any doubt as to the suitability of the structure we recommend you either have a builder take a look or alternatively install metal posts instead.
The Fitting Process
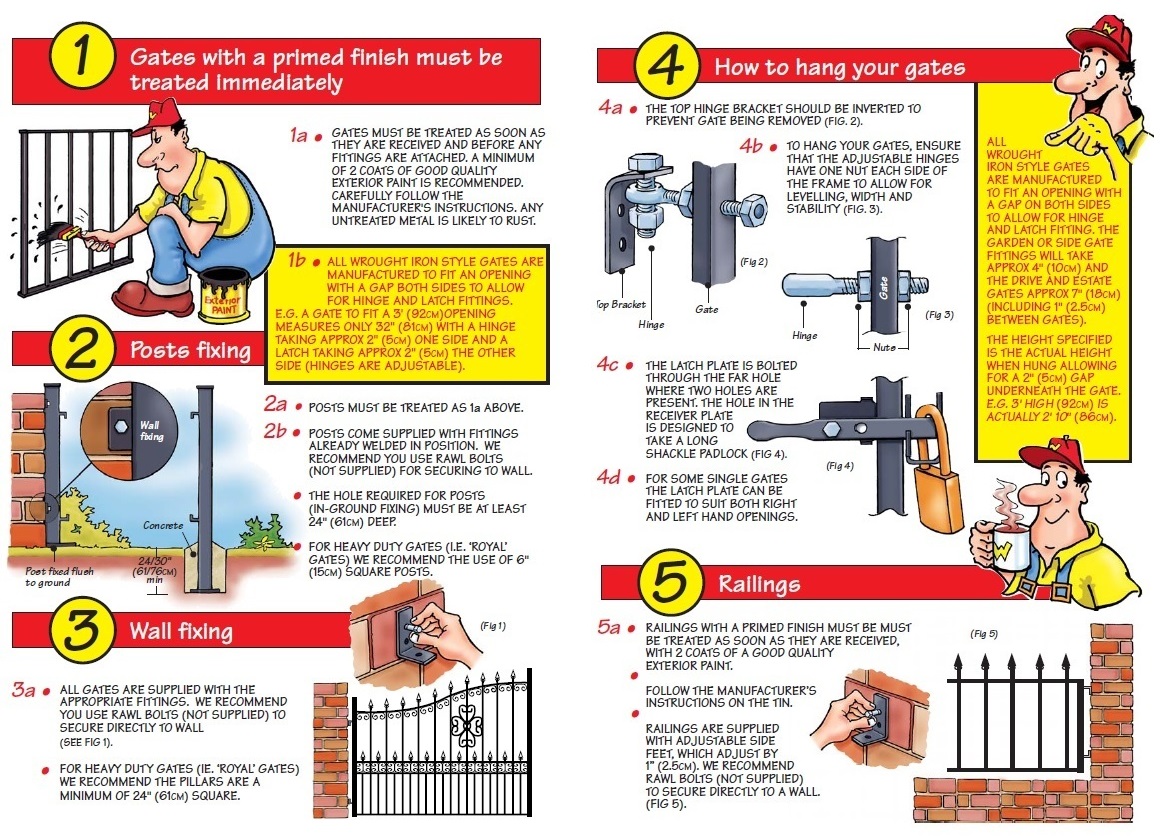
- In order to provide ground clearance for the gate so it can open and close freely, take a piece of wood and place it across the bottom of opening so the gate can sit on it whilst you install it.
- Start off by connecting the hinges to the gate so you can position it within the opening.
- Once connected, take the gate and place it in the closed position within the opening making sure it is sitting on the timber you have already put in position.
- Position the wall mounted part of the top hinge to the desired location of the brickwork and mark its location including the fixing points as these will need to be drilled out later on.
- Holding it in position, use a spirit level to plumb the gate so it is vertical and mark the location of the bottom hinge.
- Remove from the opening and carefully place to one side.
- Drill all the fixing holes to the correct depth and fit either wall plugs or bolts (depending upon the choice of fixings you have selected)
- Place back in the opening and screw all the fixings into so they are tightly secured.
- The piece of wood can now be removed as the gate should be hanging freely of its own accord.
- Check it is plum and level, making minor adjustments using either the adjustable hinges (where applicable) or timber packers behind the hinge points until you are happy with the final position.
- Fix the latch so you can position the latch plate on the wall.
- Close the gate to the desired position and mark the latch plate fixing holes.
- Drill all the required holes and fix in place using the desired fixings.
- Close the gate to check the final position and everything should be complete.
Tools Required
- Hammer
- Spirit Level
- Various drill bits
- Screwdriver
- Small selection of spanners
Please note that Garden Gates Direct have provdided the above information as a guide and should not be fully relied upon as being accurate for every installation.
- Railings